
Manuals
Correcting open questions
After the exam, you can check your students’ answers. You can correct questions grouped by exam (i.e., by student) or by question. It’s best to indicate your preference to your key user before the exam takes place.
You should also indicate whether you:
- want the exams anonymised for correction so it is impossible for the corrector to tell whose answers they are checking;
- want to have multiple correctors working on the exams and who they will be; and
- want to have each question checked by a different corrector and which corrector(s) will be checking which answers(s).
It is possible to decide about the options outlined above after the exam has taken place. Confer with your key user.
The following steps explain how to correct open questions in Remindo.
-
Step 1
- Log in to student view with your solis ID and password: remindo.uu.nl.
-
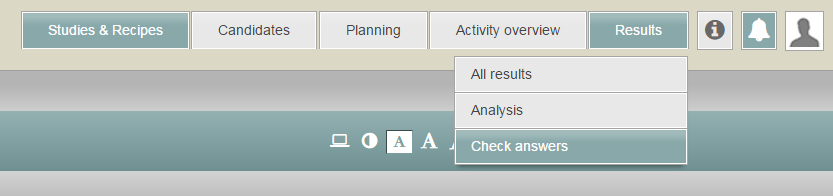
Step 2
- Hover your mouse cursor over the Results tab in the top right corner of the screen. A drop-down menu will appear showing three options: All results, Analysis and Check answers.
- Click Check answers.
-
Step 3
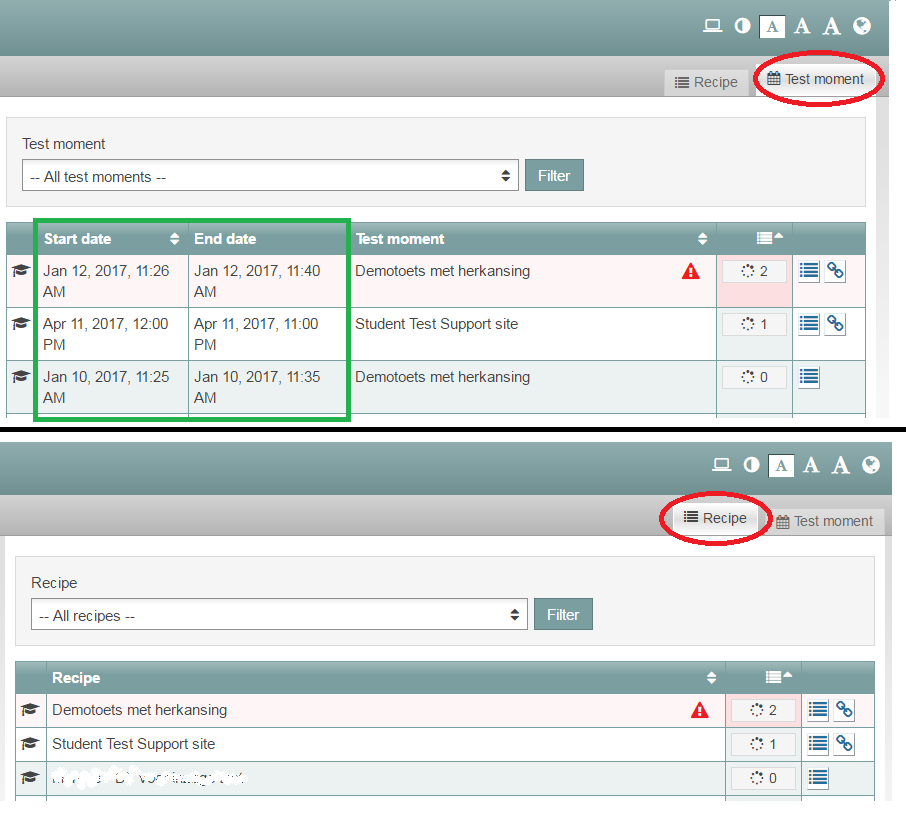
- Select whether to check answers for a Recipe or a Test moment.
- Test moment means you will only see the answers of students who performed the exam at the same time.
- Recipe means you will see all students’ answers, regardless of when they performed the exam.
- The image shows you what selecting for recipe or test moment looks like.
-
Step 4
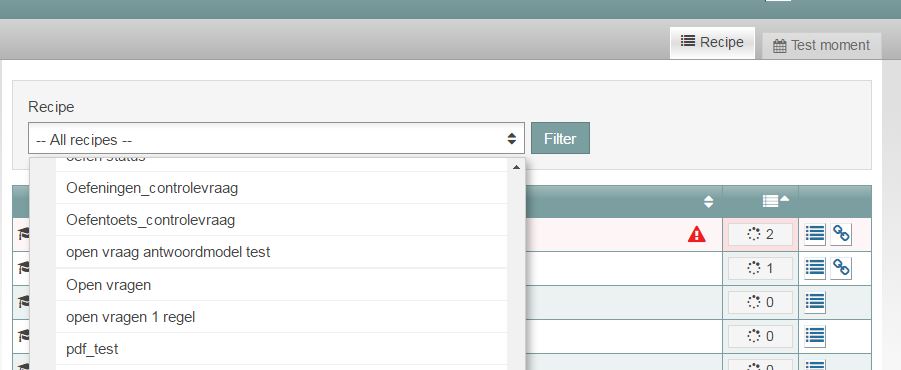
- Use filters to find the test moment or recipe whose answers you want to check.
-
Step 5
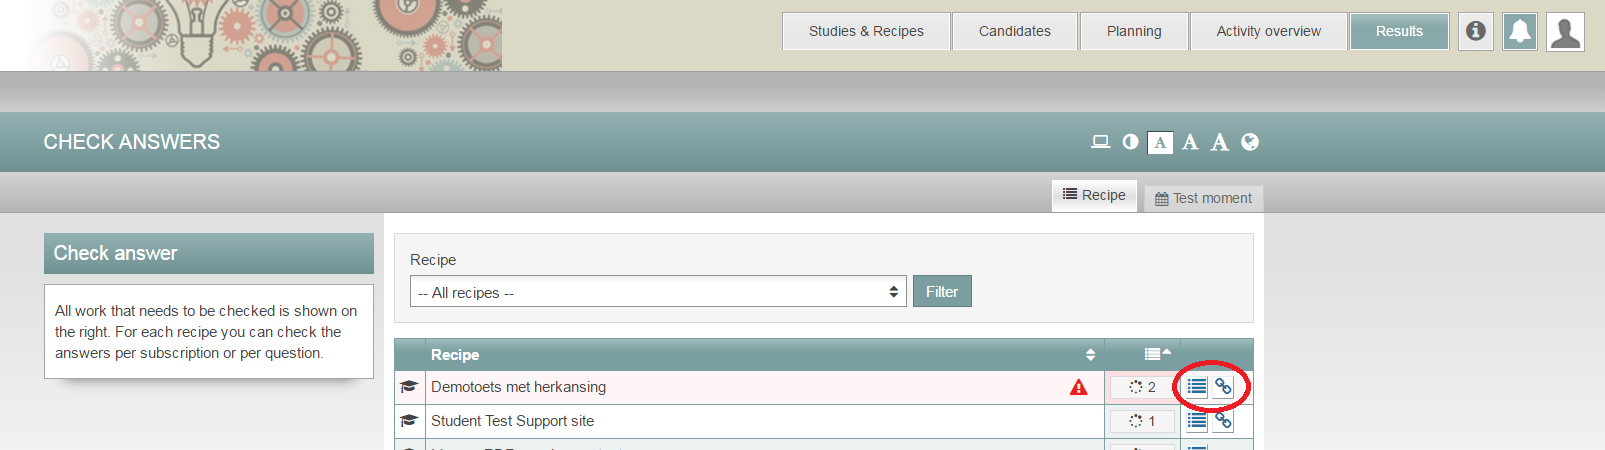
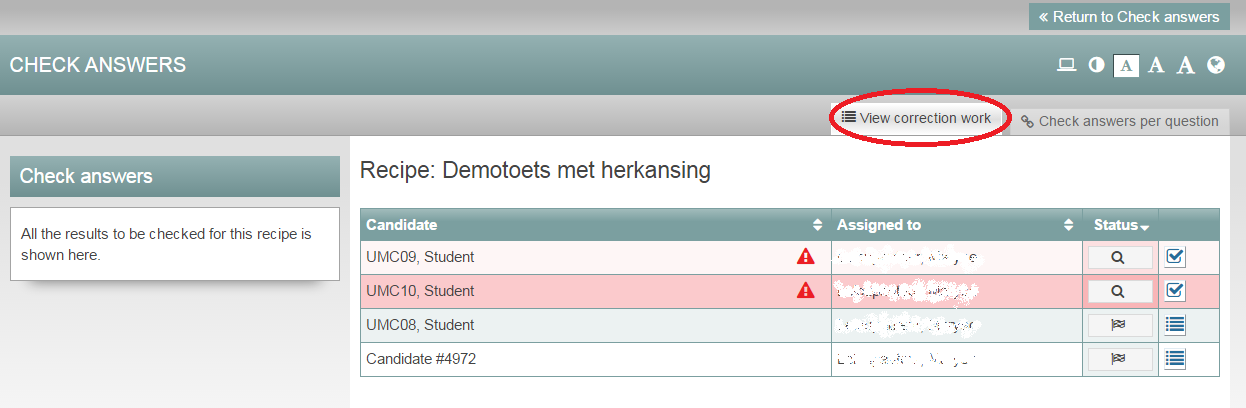
- You will see the filtered recipe or test moment on screen.
- To the right of the filtered recipe, you’ll see the number of students with open correction work. To the right of that number are two icons: View correction work and Check answers, see image.
-
Step 6
- Choose whether you want to do your corrections one test at a time (View correction work) or one question at a time (Check answers).
- The steps that follow explain the differences between checking by test or by question.
-
Step 7
Checking by test:
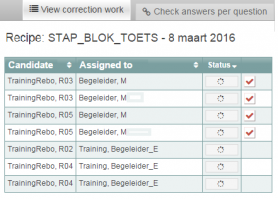
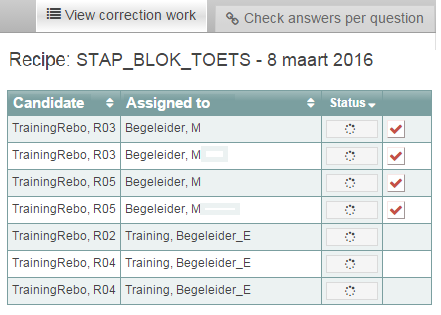
- When you choose to check answers one test at a time with View correction work, you’ll see a list (which may be anonymised) of the students whose open questions have not been checked yet. You’ll also see the status of the correction and possibly which tutor has been assigned to do corrections for the student (see image).
-
Please note! When you click View correction work and it was decided beforehand that you would only be checking a few of the questions rather than the whole exam, then each question will be counted as a separate correction job. That’s why each student will appear in the list multiple times: once for each question (though you won’t be able to see in the entry exactly which question it represents).
-
Step 8
Checking by question:
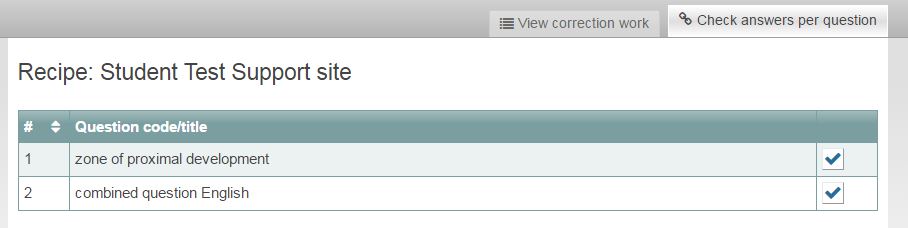
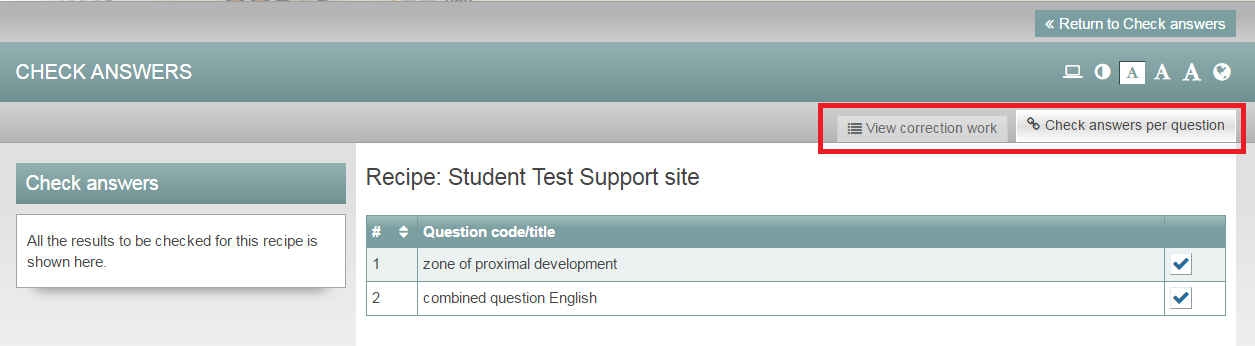
- When you select Check answers, you will see an overview of the questions that need to be checked.
- If it was decided beforehand that you would only be checking a few of the questions rather than the whole exam, then you will only see the questions assigned to you in this overview. In the example, the corrector is only authorised to check questions 4, 5 and 6.
-
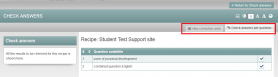
Tip! You can use the tabs View correction work and Check answers to switch between correction methods.
-
Step 9
- In the overview, click the checkmark to the right of a question or student’s name to start checking.
- In the example below, we will choose to check by student.
-
Step 10
Checking by student.
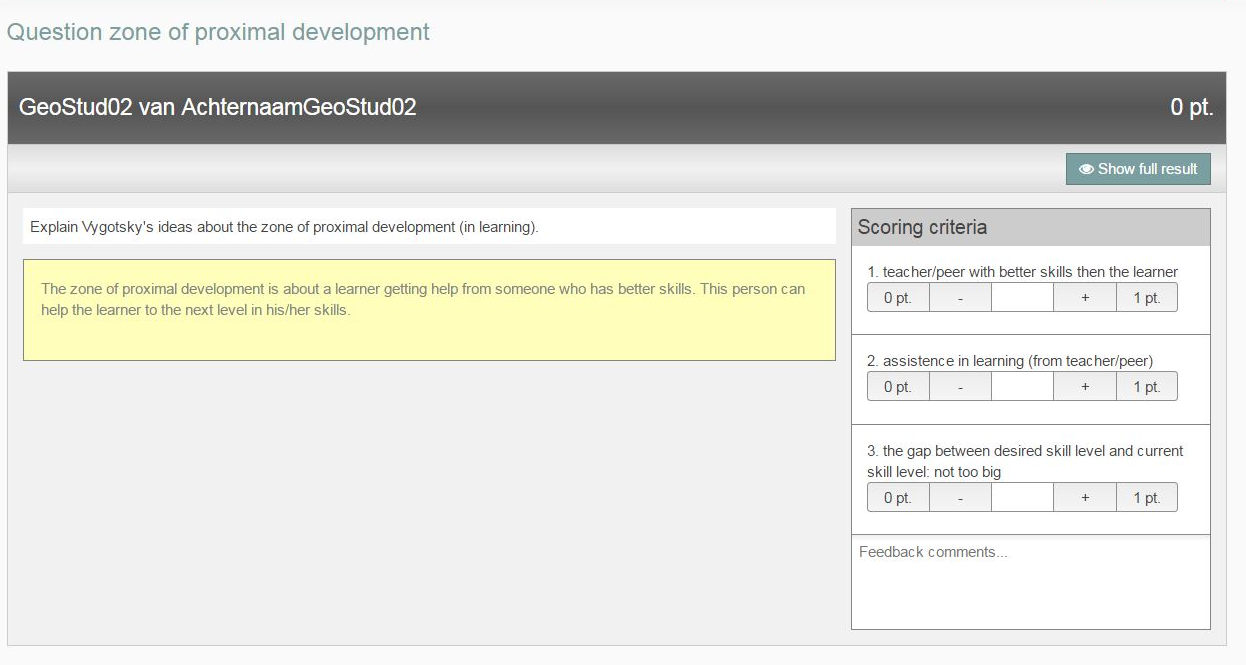
You will see the first candidate’s questions that need checking listed together. For each question, you will see the following: On the left are the question (white background) and the answer (yellow background). On the right, under scoring criteria, you can award points based on the criteria included with the question. Until points have been awarded, the fields in each scoring criterium will remain greyed out.
Follow these steps as you evaluate a question:
- In the centre of the scale is the number of points to be awarded for each criterion.
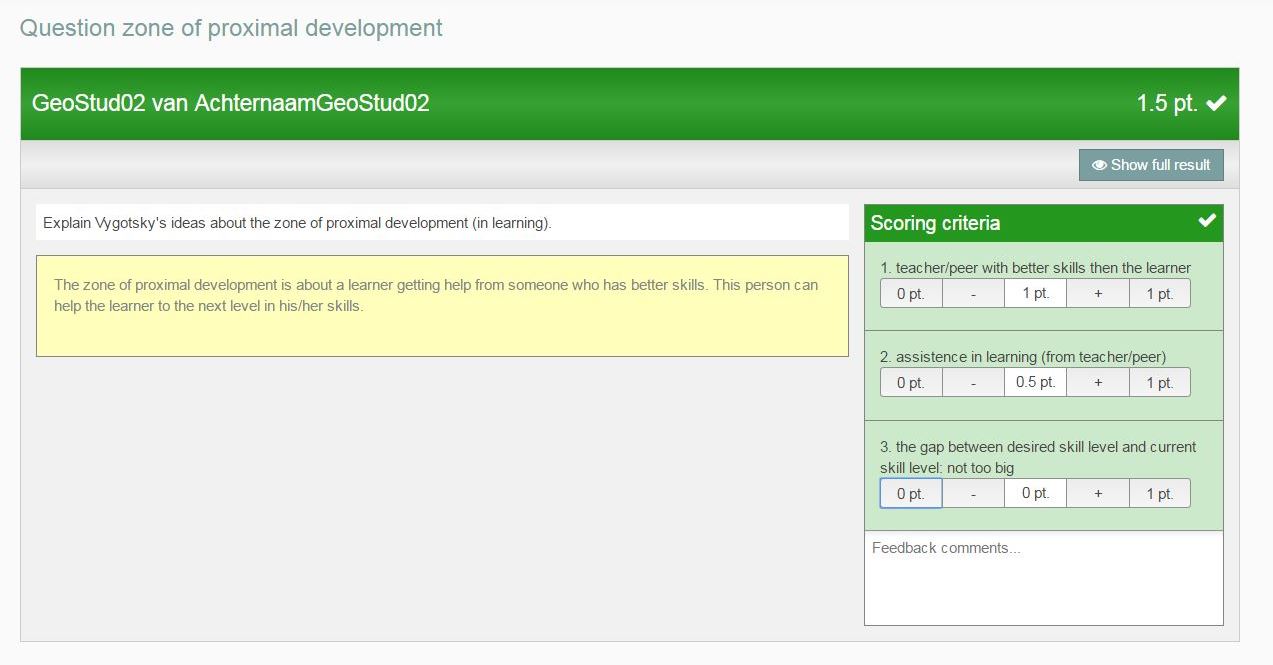
- You can increase and decrease the number of points with the plus and minus signs. This happens in increments of one tenth of a point up to the maximum number of points possible for that criterion (if you have set it up so you can award scores with a decimal). If you choose not to score by decimals, but want to assign, say, a score of 1.5 out of 4 points, enter the value manually, using a comma instead of a decimal point: 1,5. After you manually enter 1,5 points, clicking the plus or minus sign will add or subtract 0.4 points. Click on the left or right side of the scale to assign zero points or the maximum. Once evaluated, the criterion will turn green.
- The total number of points for the question will appear in the wide bar above the question.
- Add whatever comments you wish.
-
Step 11
- Once all the criteria have been evaluated, all the bars in the question will turn dark green.
- For an overview of the question and the points awarded, click ‘Show complete result‘.
- Only when points have been assigned to all evaluation criteria for a question will the question be considered checked.
-
Step 12
- Now check and evaluate the candidate’s other questions
- When you finish evaluating all of the candidate’s questions, a Continue button will appear at the top of the screen. Click it to continue to the next candidate.
- The same principle applies when you are correcting by question rather than by candidate: After correcting a question for all candidates, click Continue to go on to the next question in the exam.
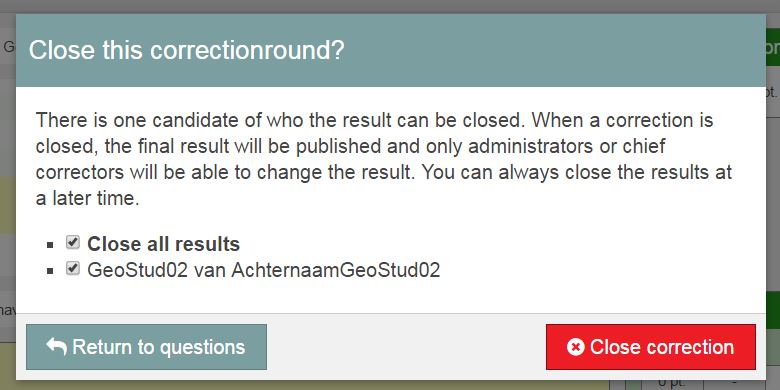
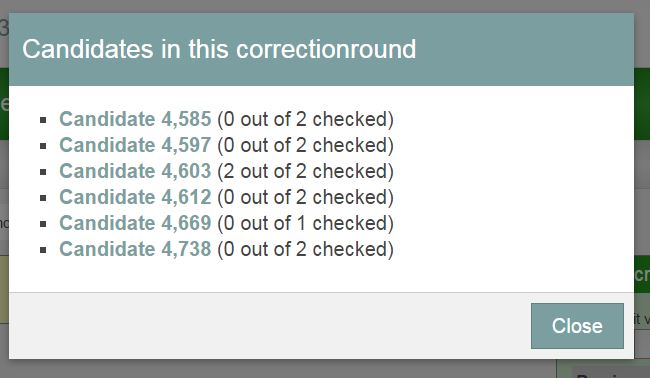
- If you want to submit some candidates’ results before all candidates’ exams have been corrected, you can do so with the Close button. A pop-up window will appear listing all students for whom you have corrected all questions (assigned to you). Not until all of a student’s questions have been corrected by the correctors to whom they have been assigned will that student be able to see their exam result.

-
Switching between candidates on the fly
- Click ‘Change candidate‘. A pop-up will show how many of the open questions have been corrected for each candidate.
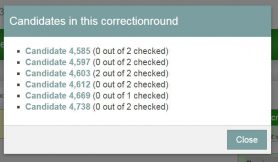
- Click a candidate (or anonymous candidate number) to go to another candidate.
- Click ‘Change candidate‘. A pop-up will show how many of the open questions have been corrected for each candidate.
-
-
Step 13
When you have corrected all questions for all candidates (or vice versa) and you click the Continue button again, this pop-up will appear: