
Manuals
Remindo’s structure
This page offers an overview of the main elements of Remindo’s Admin van Student view environments, the tabs in each of those environments and the most important functions on each tab. We provide this page to give a more complete sense of how Remindo is structured.
The fold-out menu on the home page contains detailed descriptions of nearly all functionality in Remindo.
-
Step 1
Remindo structure overview
As a teacher working in Remindo, you will be using both the Admin View and Student View environments. You log in to each environment separately (Admin view login/Student view login). Using your Solis-ID, you’ll be able to log in immediately, but you want actually have access to anything. Your account needs to be linked to an item bank and academic programme. Your key-usercan take care of that for you.
Both Remindo environments show persistent tabs in the top right corner of the screen. Folding out or clicking those tabs gives you a choice of functions (see screenshot for an example).
You will often be able to click through on the pages that show up. You can find manuals for how to do so on the home page’s fold-out menu.
-
Step 2
Admin view and Student view – what’s the difference?
- Admin view: You will create the structure and content (like exam questions) for your exams in ‘Admin view’. This is also where you configure exam settings like the caesura and (technical) requirements for your exam, such as requirements for announcing results and providing feedback. Remindo supports three different assessment types: Practice, Graded practice, and Exam.
- Student view: This environment is where you plan the performance of the exam, monitor the exam as it is performed, check open questions, plan a review afterwards, and analyse the results (various links). When you go to check open questions, an entirely separate correction environment will open, requiring no additional login details. ‘Student view for teachers’ is not just for monitoring exams anymore.
- Student view (for students): Students perform the exam in their own digital environment that they log in to with their own username and password. You will never enter this environment as a teacher, but it is possible to simulate this environment to test an exam.
-
Step 3
Admin view – organisation
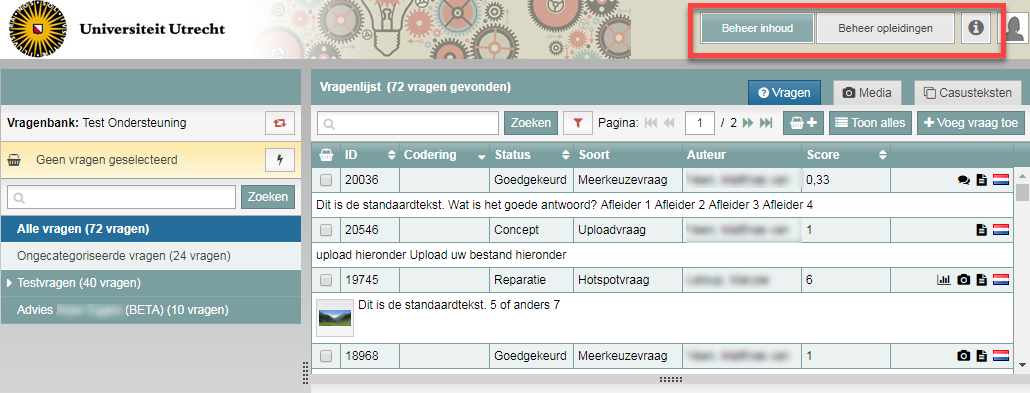
At the top of the Admin view screen are two tabs: ‘Manage content’ and ‘Manage studies’ (see screenshot).
‘Manage content’:
- Is where you create, edit and manage exam questions. Management includes deciding the folders (categories) you keep your questions in.
- Contains information about the questions, such as values from the question analysis, their history and when they’ve been used in the past.
- Allows you to run basic tests on questions and ‘approve’ them if they pass.
‘Manage studies’:
- Is where you create exams (Remindo uses a flexible exam template it calls a ‘recipe’). A recipe defines the structure and content of the exam. Once your exam is complete, you activate it to make it available for use.
- Allows you to copy exams or create them by pulling a selection of questions from a ‘source recipe’.
- Is where you configure exam settings like the caesura, whether to negate guessing, and how many points each question is worth. There are also (technical) settings like the ability to protect the screen from text selection and right clicks. You can even add introductory remarks to your exam.
- Supports downloading your exam as a PDF file.
- Can calculate Cronbach’s alpha for your exam.
- Allows you to export data, including a raw, basic export of the exam results (which can be hard to interpret) and a report of the analysis values for each question.
‘Manage studies’ might more accurately be called ‘Manage exams’.
Tip! For an exhaustive description of the ‘Manage studies’ page, consult this page. There, you will also find links to all the pages hidden behind the buttons.
-
Step 4
The connection between ‘Manage content’ and ‘Manage studies’
‘Manage content’ and ‘Manage studies’ are linked, since you use the questions you create in the former in the exams you create in the latter. When constructing your exam, you can only use questions that have been ‘approved’. Any changes you make to questions in ‘Manage content’ will be automatically applied wherever those questions appear in your recipe(s).
The connection between Admin view and Student view
Only ‘activated’ recipes are eligible to be scheduled in Student view as an exam. If you schedule an exam and then change one of the questions in ‘Manage content’, the question in the scheduled exam will automatically change to match.
Some of the (technical) settings you configure for your exam determine what you’re allowed to edit and what options you have in Student view.
-
Step 5
Student view – organisation
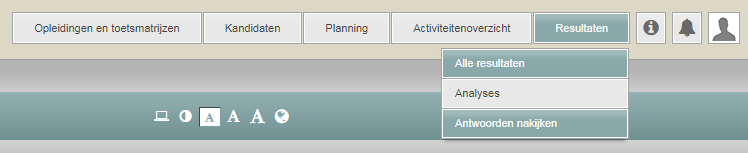
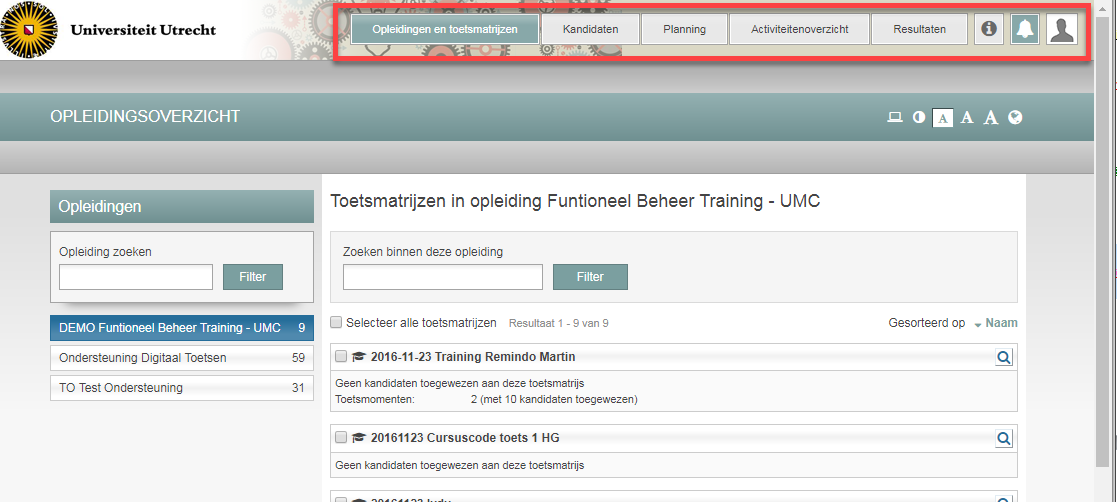
Teachers have a number of different buttons at their disposal in the top right corner of Student view. See screenshot.
‘Studies and recipes’:
- Allows you to test a recipe, showing you what the student will see when they perform the exam.
- Collects all of the recipes for your study in one place.
- Gives you access to the information you can also find in the ‘Planning’ tab, such as when and how the exam is to be performed. Unless you are an experienced Remindo user, you’re better off using the ‘Planning’ tab to view this information.
‘Candidates’:
- Shows you how many students are in your candidate groups.
- Contains information about the registration of individual candidates for your exams and allows you to edit those registrations.
- Has icons linking to the ‘Studies and recipes’ and ‘Results’ tabs.
‘Planning’:
- Is where you plan, configure and manage exam performances and reviews.
- Is where you add candidates to the exam performance and assign extra time to candidates entitled to it.
- Allows you to add supervisors.
- Is where you configure the correction round(s) and the distribution among correctors.
- Lets you edit the recipe settings both before and after the exam performance, provided that has been allowed in the settings under ‘Manage studies’.
The ‘Activity overview‘ is where you monitor an exam in progress. This means:
- Granting students permission to start their exam or review.
- Monitoring who is still working on the exam, how far along the students are and who has completed the exam.
- Granting additional time if required, though the preferred method is to preconfigure this extra time when ‘Planning’ the exam.
(Also see the ‘Monitoring test taking process’ file on this page)
‘Results’:
- Is where you check open questions and, if the recipe settings allow it, edit how many points are assigned to each question.
- Allows you to adjust the answer model for closed questions. (These edits only affect this specific performance of the exam.)
- Shows you exam results and analyses of those results. The analysis values come in table of questions (columns) and students (rows).
- Shows you on each question how many times each answer option was chosen.
- Allows you to export exam results to Excel.
-
Please note! Confer with your key user about any manual changes you want to make to the settings in the ‘Planning’ tab. Misconfigured settings can adversely affect your exam.